


BLOG-Cookie Cutter
- Published: December 22, 2012

I never sleep so well as when I can here a distant train whistle in the night. It is a familiar sound from my youth when I grew up in the Susquehanna River Valley. The railroad tracks ran along the opposite side of the river from my family home, and the haunting whistle blows of passing trains would often soothe my slumber.
 I loved that old house. My siblings call me the family curator as the custodian of several keepsakes from that time and place. One set of sentimental objects we split among brothers and sisters are our Christmas cookie cutters.
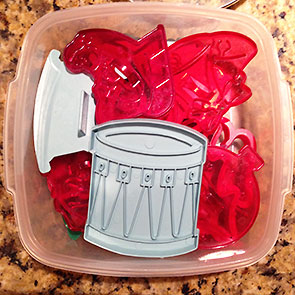
As I recall, our oldest brother has the complete set of Peanuts characters, but mostly we split the Santa Clauses, reindeer, and christmas trees among us. I have a few of our oldest cookie cutters: ruby red forms each with a gracefully curved handle. There is a Santa on his sleigh, christmas bells, and a charming snowman holding a broom. These forms were first made in the 1940s by a company in Texas and their classic christmas set A is still available today. I also have several pieces from the 1960’s made by Stanley Home Products. My favorite is the rocking horse; the set’s astronaut is exploring other worlds…in either New York or Colorado or Alabama.
Each year, when I open my cookie cutter box, I am met with many memories. I also open the Betty Crocker cookbook not to the book’s sugar cookie recipe but to my mom’s recipe lightly penciled in on the opposite page. The recipe is a favorite passed down to Mom from Grandma Helaine. I prefer this recipe too because of the orange zest and its evocative scent.
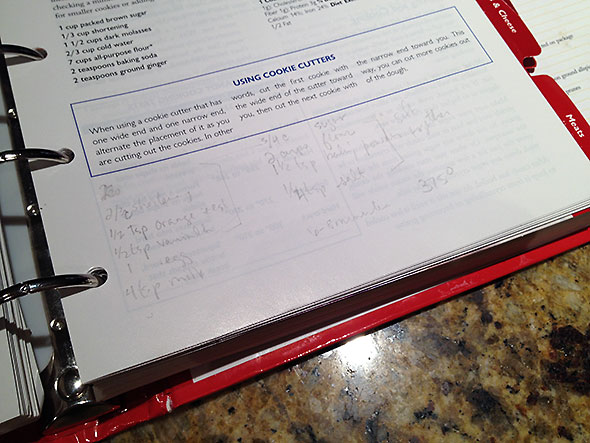
Grandma Helaine’s Sugar Cookies
2/3 cup firm butter or shortening
3/4 cup sugar
2 cups flour
1 1/2 tsp baking powder
1/4 tsp salt
1/2 tsp orange zest
1/2 tsp vanilla
1 egg
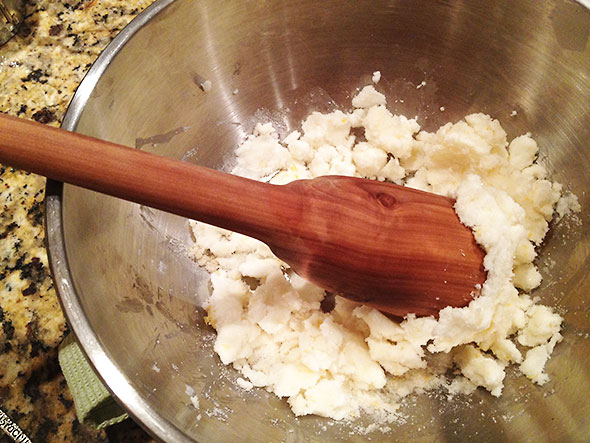
4 tsp milkMix (or muddle) the butter and sugar together to a butter cream consistency. Stir in the orange zest and vanilla. Sift together the flour, baking powder, and salt; combine with the flavored butter cream. Beat the egg and add. Finally add the milk to achieve the proper firmness. Add too much milk and the cookies will lose their smooth texture when they cook.
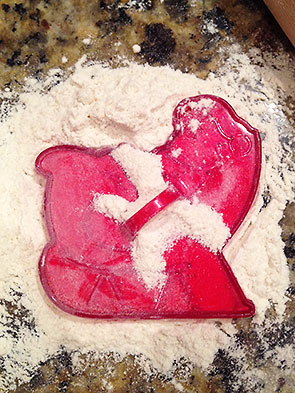
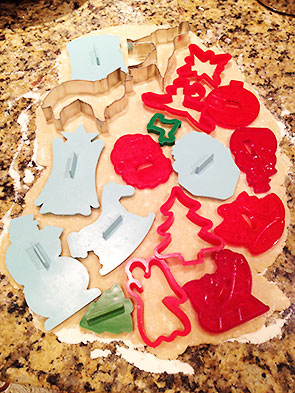
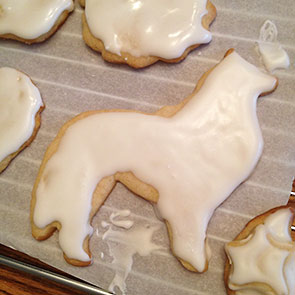
Preheat the oven to 375 degrees. Roll out the dough on a well floured surface to 1/4 inch thickness. Move the dough frequently during the rolling to prevent it sticking. Cut the cookies transferring to a cookie sheet about a half inch apart. Cook in the oven for 5-6 minutes until each cookie surface achieves a shortbread texture and there is just a hint of browning. Let cool on the sheet for a minute then transfer to a wire rack. When completely cool, ice and decorate to your pleasure.
Makes 2 dozen cookies.
One of the secrets to good shortbread cookies is the consistency of the butter cream. If the butter is melty soft, the cookies will lose their shape in the oven and spread out too thin. I take my butter straight from the refrigerator or freezer. To get it to the right softness, I pound it with a muddler. Then I knead in the sugar by hand.
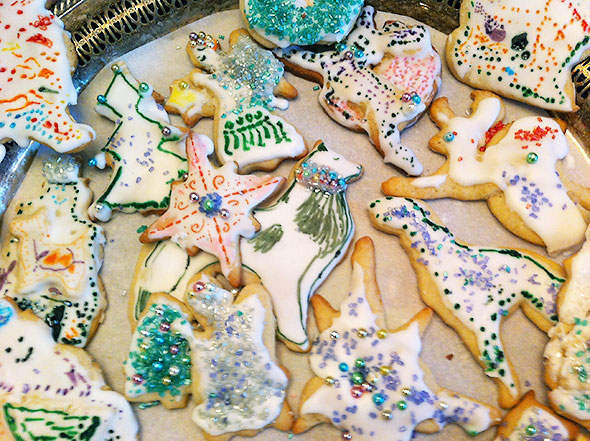
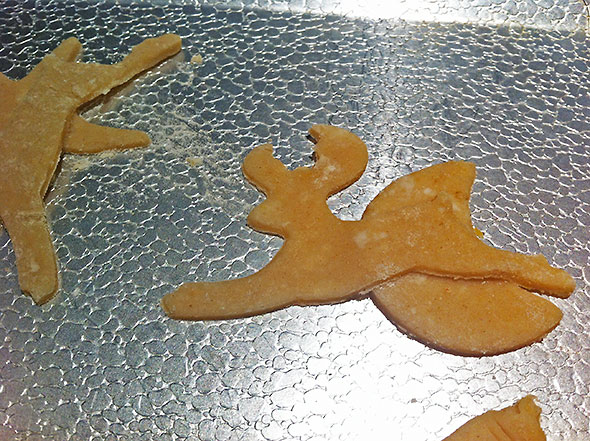
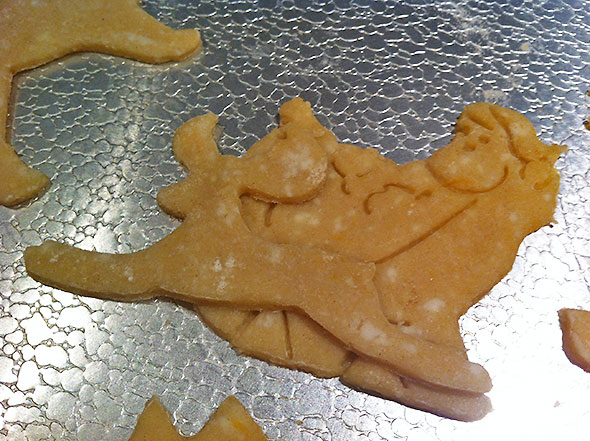
Among my cookies cutters, I have several small shapes: a leaping deer, a cute scottie dog, a small tree among them. These cookies will cook up faster than their larger neighbors if placed on the sheet by themselves. Instead I like to layer these shapes over others. The cookies bake more consistently plus I can mix and match to create many scenes. A firm batter is especially important if one should attempt this layering. Otherwise the shapes will merge into unrecognizable globs.
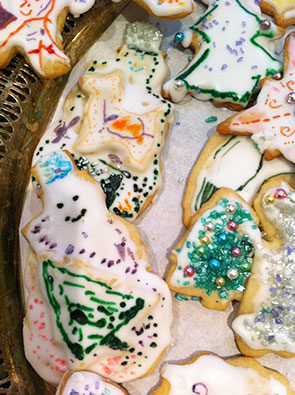
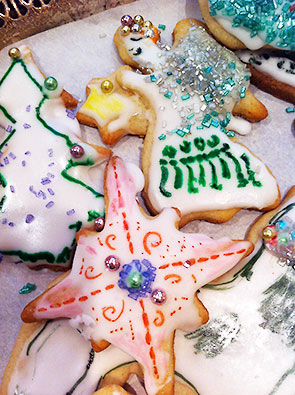
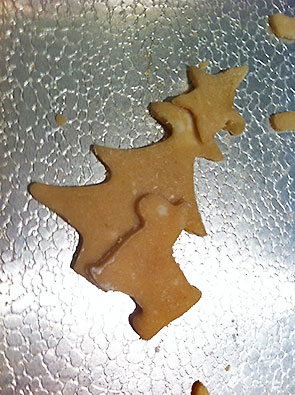 My favorite pairing is the little scottie dog standing at the base of a christmas tree. I placed a star on top from a clever cookie cutter set that I got from Tupperware about a decade ago. In other scenes, one reindeer jumps over the moon while another pulls Santa’s sleigh. Snowmen and angels carry little trees and presents as if embracing the sweet anticipation of Christmas joy.
My children are small and not yet at that stage where they can resist licking icing off the decorating knifes. Therefore, I ice the cookies myself once they are cool from the oven. I use royal icing which is best to let harden on the cookies overnight. Then, as the children and I like, we can color the cookies with foodoodlers—food safe magic markers. With two cookies, we commemorated a favorite pet named Sunny and our family Christmas tree topper—a delicate star decorated with pearls and the sweet baby Jesus at its center.
 This year I brought home sparkly sugars to add on top. Adding the sugar was easy this year because I tried icing the cookies in the morning and decorating them a few hours later. The cookies took the sugar well then, the markers not so much. But, no matter, we kept several cookies to decorate later in the week, and my 5 year old has sat down with the markers newly inspired to complete more cookies creations.
Our markers—a Christmas present from a beloved sister—are near their end after several seasons of service. The inks last a long time, but a couple of them—the green and one of the black—now leak. Eek. Still, they’ve been a great success and create really stunning cookies. Our oldest has a flare for cartoons, and this medium is perfect for her. She especially likes the layered cookies, and you cannot wonder at her motivation.
The Yellow Springs News encourages respectful discussion of this article.
You must login to post a comment.
Don't have a login? Register for a free YSNews.com account.


No comments yet for this article.